Thankfully, not quite what it sounds like …
It was two weeks ago that I followed a specialist chilli supplier’s instructions for germinating their hardcore chilli seeds. Every few days their nice warm sleep in the airing cupboard was interrupted by me turning all the lights on, peeling their tissue blanket off and blasting them with a water spray. Not normally something which induces youngsters to do what you want, but my babies finally came good today.
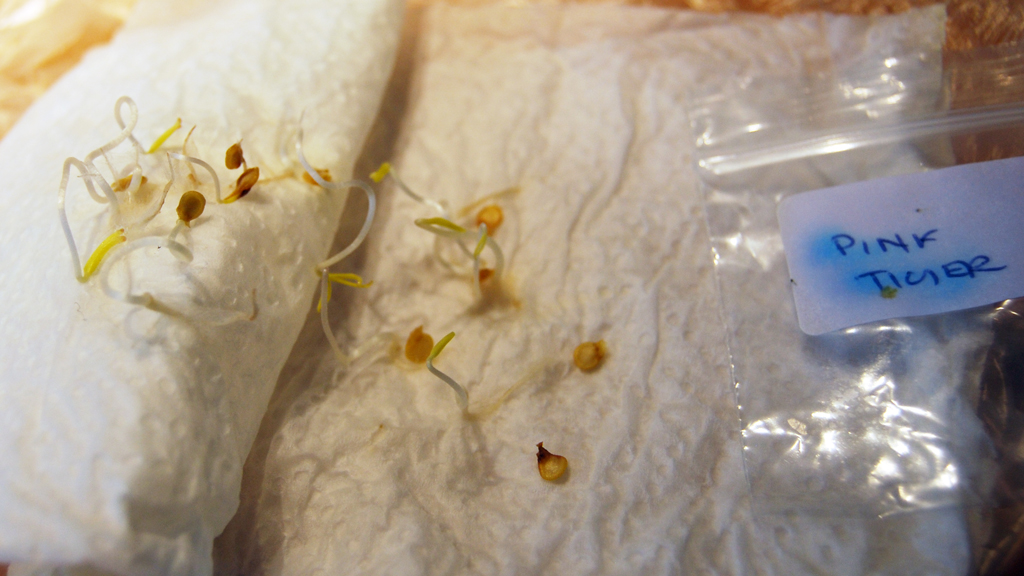
Bringing the air-filled bags downstairs to a freshly prepared propagator, I opened each one and carefully separated the damp tissues. The rarest and most desirable (for its crazy colours) Pink Tiger seeds had sprouted really well, but they were still tiny and not exactly easy to handle.
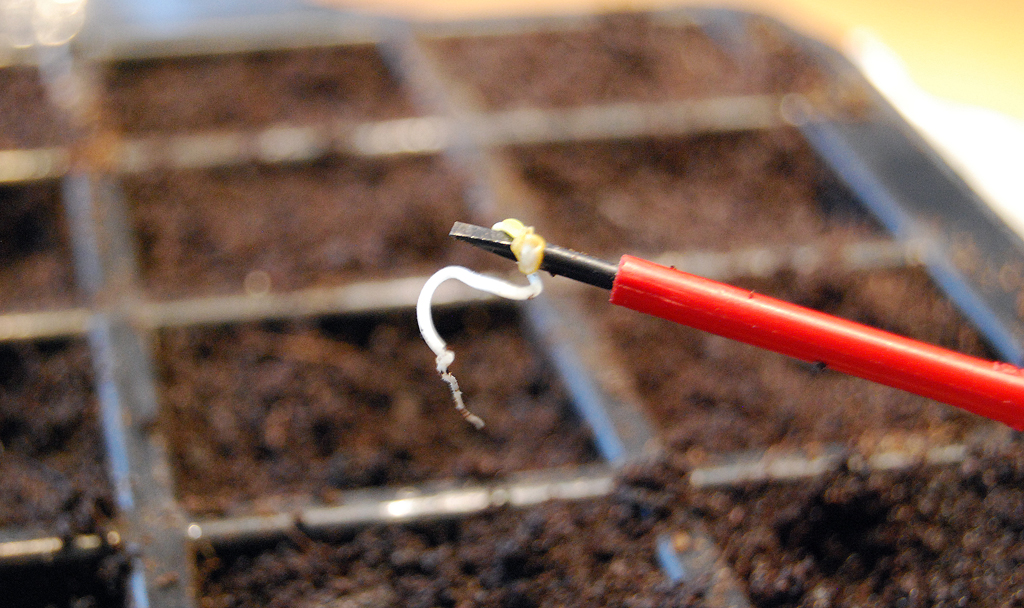
Poking a hole into the compost in each module, then lifting the seedling in with a small screwdriver was the order of the day. They say some people also use that popular seed planting tool for driving screws into things. Can’t see it ever catching on myself.
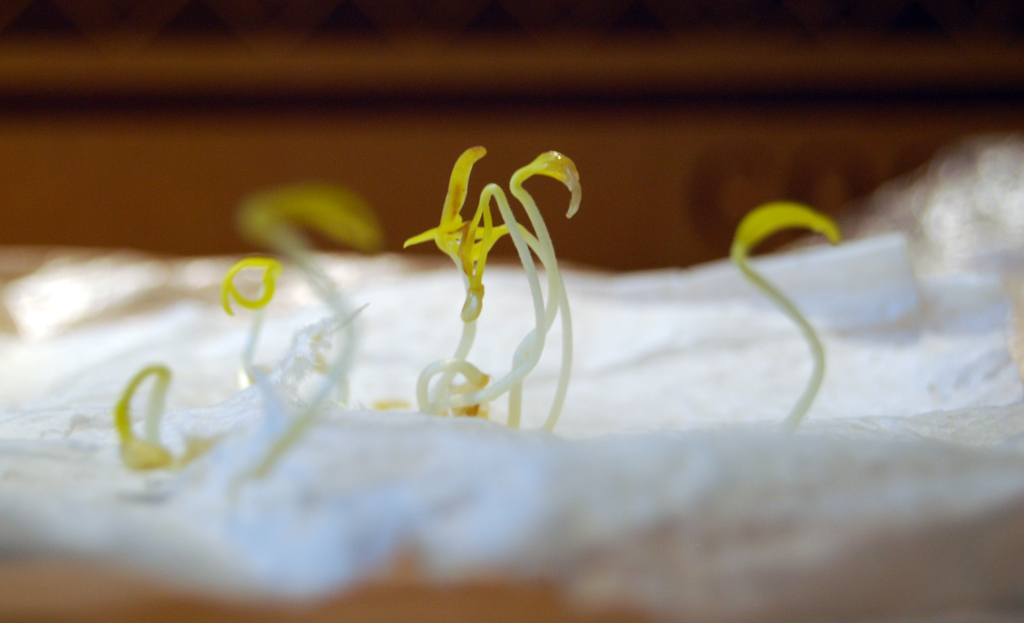
Of all the varieties I’m growing, the most common – early Jalapeños – can be started off the traditional way by sowing the seeds directly into compost, but I threw them into this process with the others. And you could see they had sprouted more vigorously than the others, the pale seedlings standing upright on the tissue.
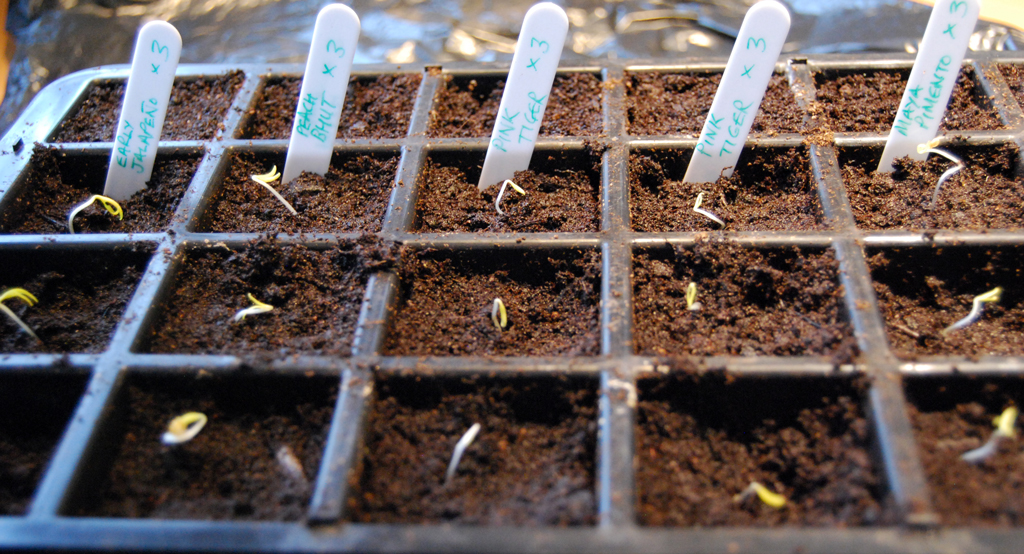
Three of each variety seemed enough to go in the propagator (one variety, the Yucatan White Habanero, needs another week upstairs) so it’s now settled near a south-facing window with some foil behind it to reflect what little light there is this month.
Meanwhile, today felt like a good day to try out the cheese making kit I got at Christmas (I did ask for it). Never having made cheese before, it was wise to use a kit like this to learn the ropes, with all the clever ingredients provided.
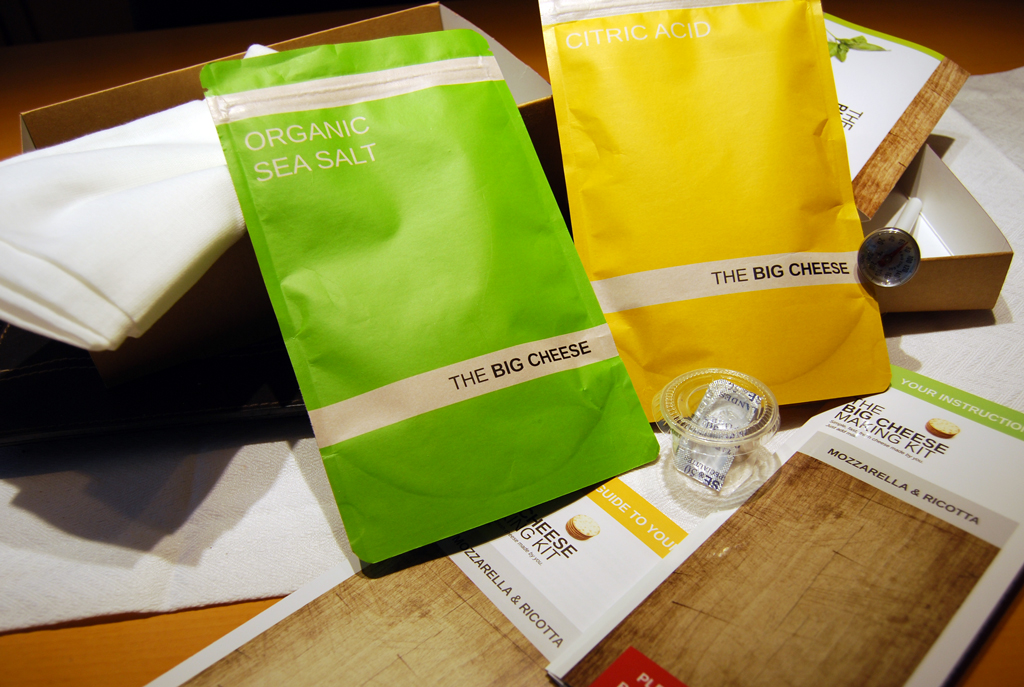
This kit makes either Mozzarella or Ricotta, depending which recipe you follow. Mozzarella felt more interesting, so in went four pints of milk over a medium heat to get things started.
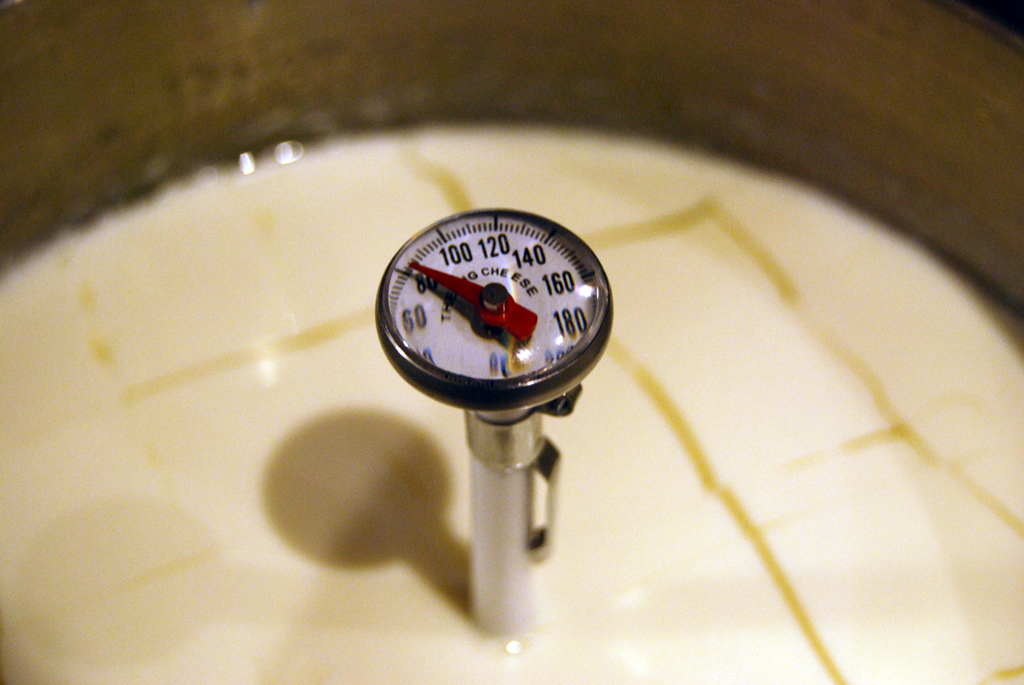

Mixing in rennet and citric acid and waiting twenty minutes had the curds and whey separating nicely, such that you could cut a grid pattern to start breaking the curds up. The whey then gets drained off and reheated, at which point you take a handful of the curds and dunk them in the hot whey for a minute.
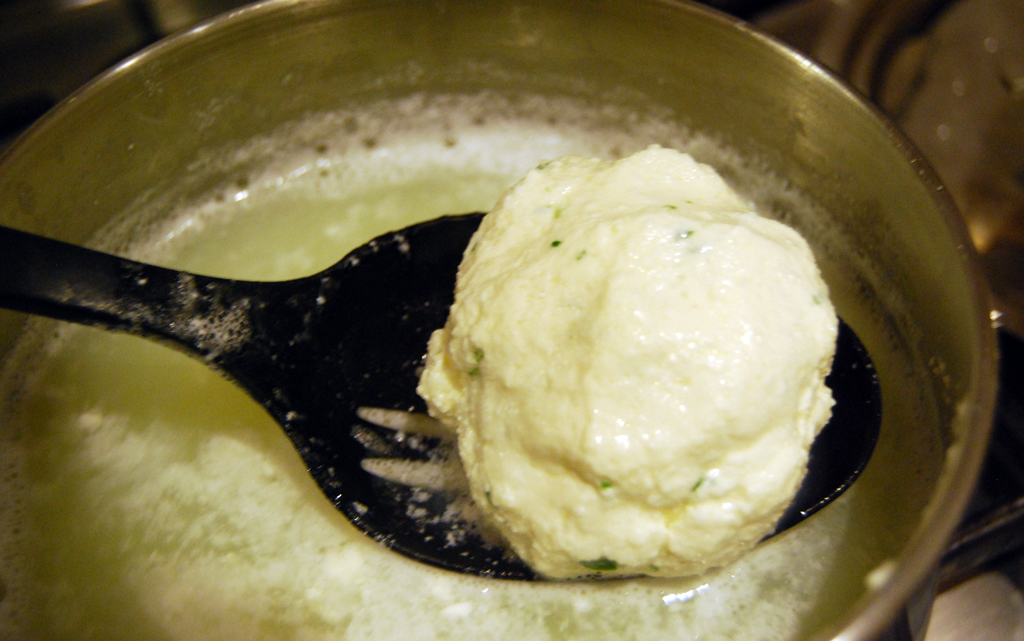
I was surprised that the next technique was to knead the hot cheese, a bit like kneading bread dough. After a few minutes it was definitely smoother/less granular and had become quite springy. I threw in salt and some fresh chopped chives and skinny spring onions from the garden for extra flavour. Chilli flakes also work well apparently.
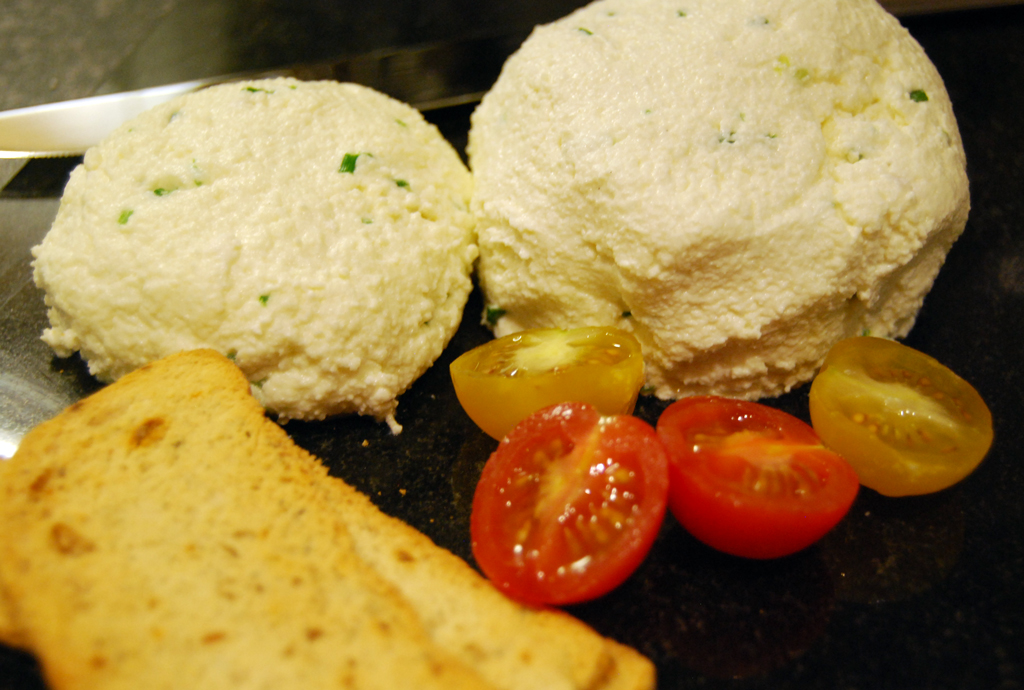
The finished product looked and felt like the real thing and actually tasted delicious and very creamy. I think more practice is needed to get the texture right, but for a first attempt it was OK. Of course it’s only eight or so months until Autumn, when the first of those insane chillis should be ready to pick .. and potentially shred into some nice home-made fresh cheese. Red-Hot Ricotta? Menacing Mozarella? Can’t wait 🙂

I’ve got the halloumi version of that kit! Not been brave enough to try it yet, but mebbe it’s time to take it off the shelf and open it.
LikeLiked by 1 person
It’s fun, but you do end up with a lot of washing up to do!
LikeLike